Onboarding Checklists That Actually Reduce Churn (Not Just Busywork)
Most onboarding checklists fail because they list tasks, not outcomes. Here’s how to build an outcome-based checklist that nudges users to real value milestones, adapts by role and use case, stays short enough to finish fast, and measures success via activation events—not vanity clicks.
 featured image")
Most onboarding checklists don’t reduce churn. They increase it.
Not because checklists are bad—but because many are built as “things to click” instead of “value milestones to reach.” Users complete the list, feel productive, and still never experience the product’s core value. Then they churn.
This guide shows how to build an outcome-based onboarding checklist that:
- Moves users to value milestones (not random setup tasks)
- Adapts by role and use case without becoming a 20-item monster
- Uses progressive disclosure so it’s finishable in one session
- Measures completion quality via activation events, not checklist clicks
Why most onboarding checklists fail
A checklist becomes busywork when it’s optimized for completion, not activation.
Common failure modes:
- Task lists without a promise: “Upload logo,” “Invite teammates,” “Connect integration” with no clear payoff.
- One-size-fits-none: Same steps for admins, contributors, and viewers—even though their time-to-value paths differ.
- Too long to finish: 10–15 items signals “this will take forever,” so users bounce.
- Vanity measurement: Tracking checklist item clicks instead of whether the user actually reached value.
If your checklist completion rate is high but activation and retention are flat, you’re likely measuring the wrong thing.
Start with outcomes: turn tasks into value milestones
An outcome-based checklist is built backward from the moment a user says: “Okay, this is useful.”
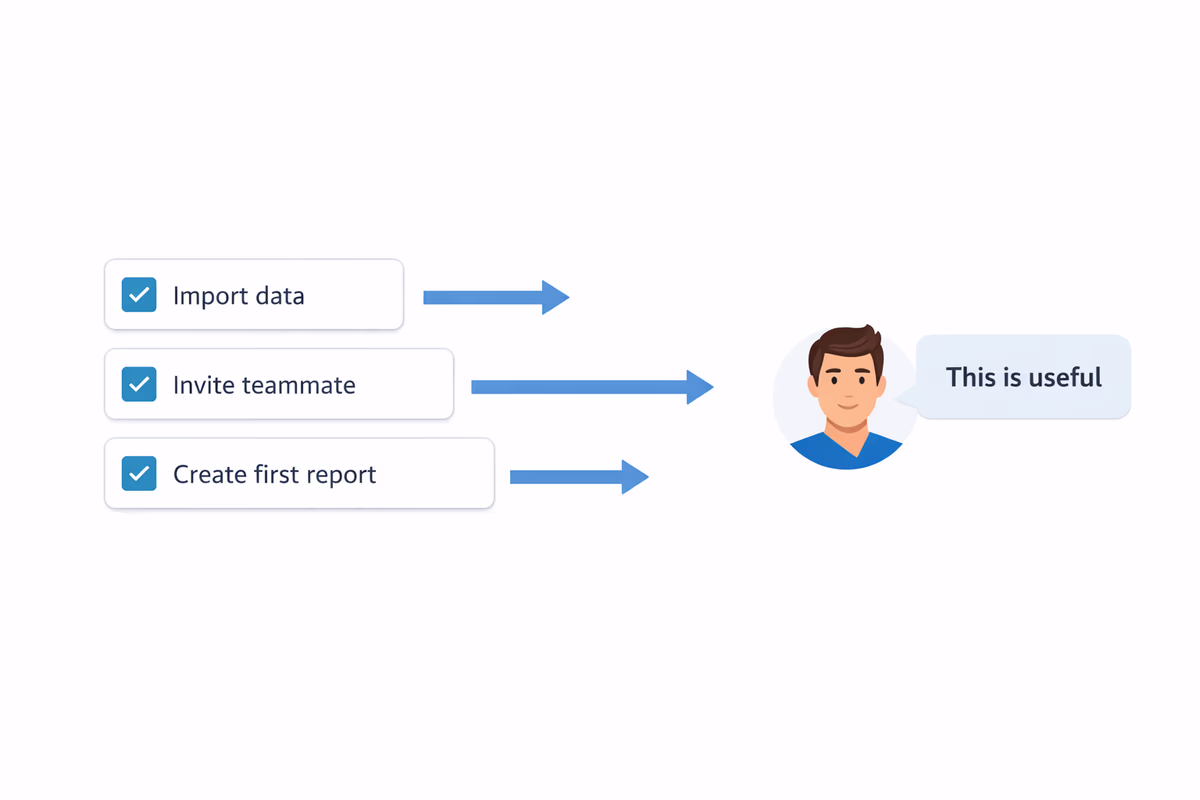
Step 1: Define your activation moment (per use case)
Pick 1–2 activation events that correlate strongly with retention. These should be observable behaviors, not feelings.
Examples (B2B SaaS):
- Project management: “Created a project + assigned 3 tasks”
- CRM: “Imported contacts + logged 1 activity”
- Analytics: “Installed tracking + viewed first dashboard with real data”
- Support tool: “Connected inbox + resolved first ticket”
If you serve multiple use cases, define activation per segment (more on that below).
Step 2: Identify the minimum path to that outcome
Ask: what is the shortest credible path from signup to activation?
List only the steps that are truly required. Everything else is optional education.
A good checklist item is:
- User-visible: the user can tell when it’s done
- Value-linked: it directly unlocks the next value milestone
- Low-friction: can be done in under ~2 minutes
Step 3: Write checklist items as “do X to get Y”
Users don’t care about configuration. They care about progress.
Instead of:
- “Connect Slack”
Use:
- “Connect Slack to get alerts where your team already works”
Instead of:
- “Invite teammates”
Use:
- “Invite 1 teammate to collaborate on your first workflow”
Keep it short: the 3–5 item rule (and what to do when you can’t)
A checklist that reduces churn is usually 3–5 items for the first session.
Why? Because early churn often happens before the user has momentum. Your job is to create a fast win.
If your product truly needs more steps, don’t cram them into one list. Use progressive disclosure:
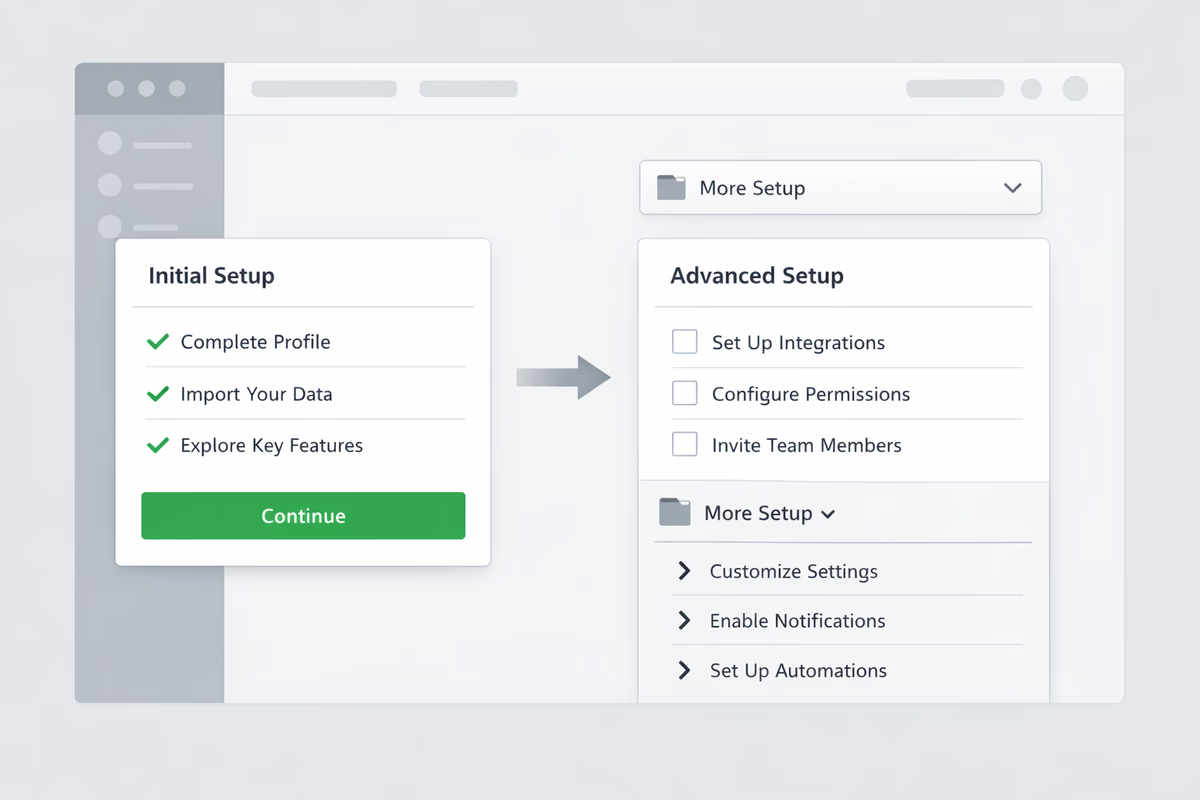
- Session 1 checklist: 3–5 items to reach first value
- Session 2 checklist: next 3–5 items to deepen value (e.g., collaboration, automation)
- Ongoing “power” checklist: optional enhancements for expansion
A practical pattern:
- Show Checklist A until activation event is reached
- Then replace it with Checklist B focused on habit formation or team rollout
Checklist UX patterns that drive completion (without being annoying)
A checklist is a UI component. Treat it like one.
Pattern 1: Anchor the checklist near the work
Don’t hide it in a settings page. Put it where users take action:
- A dashboard card
- A side panel in the main workspace
- A persistent widget that can be collapsed
Pattern 2: One click should start the step
Every checklist item should deep-link to the exact screen/state where the action happens.
Bad: “Create your first project” → takes user to a generic projects page.
Good: “Create your first project” → opens the create modal with 1–2 fields pre-filled.
Pattern 3: Pair checklist items with in-app guidance
A checklist tells users what to do. Tooltips, hotspots, and guided flows show them how.
Use lightweight guidance for each item:
- Tooltip on the exact button
- Short guided step that ends with the real action
- Inline validation to prevent dead ends
Pattern 4: Use micro-commitments, not giant steps
Break “Setup your workspace” into something finishable:
- “Name your workspace”
- “Add 1 data source”
- “Create 1 report”
But don’t over-split. If it feels like a gamified grind, users will resent it.
Pattern 5: Make progress feel real (and reversible)
- Show % progress only if it’s meaningful (3/4 is fine; 17/42 is not)
- Allow users to dismiss or snooze the checklist
- Never trap users in the checklist—let them explore
Segment the checklist by role and use case (without creating a maintenance nightmare)
Personalization is where checklists go from “generic onboarding” to “this product gets me.”
What to segment on
Start with 2–3 segments you can reliably infer:
- Role: admin vs end user vs manager
- Use case: e.g., “support,” “sales,” “ops”
- Plan motion: trial vs freemium vs sales-assisted
Use a short welcome question (1–2 questions max) or infer from signup metadata.
How to keep it maintainable
Use a modular approach:
- Core checklist (same for everyone): 1–2 items that always matter
- Segment module: 2–3 items that change based on role/use case
Example structure:
- Core: “Create your first workspace”
- Segment (Sales): “Import 25 leads” + “Log your first activity”
- Segment (Support): “Connect inbox” + “Resolve first ticket”
In-app checklist vs email checklist: when to use which
They’re not interchangeable.
Use an in-app checklist when:
- The user is actively in the product
- Steps require UI navigation and guidance
- You want real-time progress and contextual nudges
In-app is best for shortening time-to-value because it removes guesswork.
Use an email checklist when:
- The user needs to do work outside the app (e.g., DNS changes, approvals)
- You’re reactivating users who haven’t returned
- You’re coordinating multi-stakeholder onboarding
Email works best as a reminder + deep link back into the in-app step.
Practical combo:
- In-app checklist drives action
- Email summarizes “You’re 2 steps away from X” and links directly to the next step
Measure completion quality with activation events (not vanity clicks)
If you only track “checklist item completed,” you’ll optimize for the wrong behavior.
What to measure instead
Tie each checklist item to an instrumented event that proves the step happened.
Examples:
- “Connected integration” →
integration_connected(not “clicked connect”) - “Invited teammate” →
invite_sentormember_added - “Created first dashboard” →
dashboard_created+dashboard_viewed_with_data
Quality signals to track
- Time-to-value (TTV): time from signup to activation event
- Activation rate: % of new users reaching activation within X days
- Drop-off per step: where users stall (and why)
- Retention by activation: D7/D30 retention for activated vs non-activated users
A simple rule: if a checklist step doesn’t move an activation metric, it’s probably not a first-session step.
Examples: outcome-based checklists by plan motion
Use these as templates, not copy-paste.
Free trial checklist (optimize for fast proof)
Goal: reach “aha” quickly and prove fit.
- “Set up your workspace (1 minute)”
- “Connect your data/source to see real results”
- “Create your first [core artifact]”
- “Share it with a teammate or export it”
Activation metric: created core artifact + viewed/used with real data.
Freemium checklist (optimize for habit + expansion)
Goal: get repeated use and natural upgrade pressure.
Session 1:
- “Create your first [core artifact]”
- “Save a template so you can reuse it”
- “Set up notifications/reminders to stay on track”
Session 2 (unlocks later):
- “Invite 1 teammate to collaborate”
- “Automate a recurring workflow”
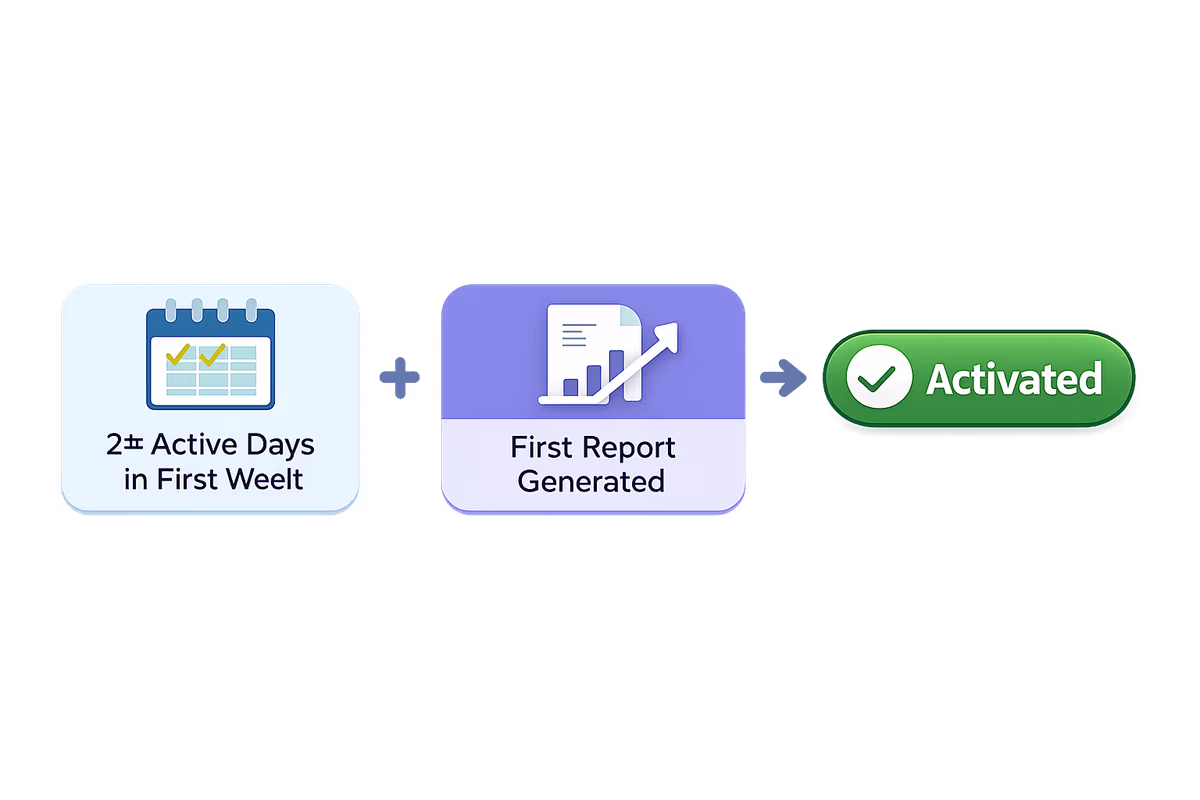
Activation metric: repeat usage event (e.g., 2+ active days in first week) plus core value event.
Sales-assisted checklist (optimize for rollout readiness)
Goal: reduce implementation risk and accelerate team adoption.
Admin checklist:
- “Add your team structure (groups/roles)”
- “Connect SSO or permissions (if applicable)”
- “Import initial data set”
- “Assign first workflow to 1 pilot group”
End-user checklist (separate):
- “Complete your first task”
- “Collaborate: comment/mention a teammate”
- “Use the feature that proves value (report, resolution, approval)”
Activation metric: pilot group completes X workflows/week.
A practical build process (you can run this week)
- Pick one segment (don’t boil the ocean).
- Define activation event(s) and the minimum path.
- Draft 3–5 checklist items written as outcomes.
- Add deep links + lightweight in-app guidance for each item.
- Instrument events for each step and the activation milestone.
- Run a 2-week test: compare activation rate and TTV vs baseline.
- Cut ruthlessly: remove steps that don’t move activation.
If you’re using User Tourly, implement the checklist as an in-app experience tied to segments, then trigger contextual tooltips or guided flows only when the user starts a step—so the checklist stays short and the guidance stays relevant.
The litmus test
A checklist reduces churn when it answers one question for the user:
“What should I do next to get value?”
If your checklist can’t answer that in 10 seconds, it’s not onboarding—it’s a to-do list.
FAQ
How many items should an onboarding checklist have?
For first-session onboarding, aim for 3–5 items. If you need more, split it into phases using progressive disclosure: one short checklist to reach the first value milestone, then a second checklist for deeper adoption (collaboration, automation, advanced setup).
What’s the difference between a task-based and outcome-based checklist?
A task-based checklist lists actions (e.g., “Invite teammates”). An outcome-based checklist ties each action to a value milestone (e.g., “Invite 1 teammate to collaborate on your first workflow”) and is built around activation events that correlate with retention.
How do I measure whether my checklist is working?
Measure activation rate and time-to-value, not just checklist completion clicks. Instrument events that prove the user completed the real action (e.g., `integration_connected`, `dashboard_viewed_with_data`) and track retention differences between activated and non-activated cohorts.
Should I use an in-app checklist or an email checklist?
Use in-app checklists when users are in the product and need contextual guidance to complete steps. Use email checklists for reactivation, multi-stakeholder onboarding, or steps that happen outside the app (approvals, DNS, procurement). The best setup is in-app as the source of truth, with email reminders that deep-link to the next step.
Table of Contents
- Why most onboarding checklists fail
- Start with outcomes: turn tasks into value milestones
- Step 1: Define your activation moment (per use case)
- Step 2: Identify the minimum path to that outcome
- Step 3: Write checklist items as “do X to get Y”
- Keep it short: the 3–5 item rule (and what to do when you can’t)
- Checklist UX patterns that drive completion (without being annoying)
- Pattern 1: Anchor the checklist near the work
- Pattern 2: One click should start the step
- Pattern 3: Pair checklist items with in-app guidance
- Pattern 4: Use micro-commitments, not giant steps
- Pattern 5: Make progress feel real (and reversible)
- Segment the checklist by role and use case (without creating a maintenance nightmare)
- What to segment on
- How to keep it maintainable
- In-app checklist vs email checklist: when to use which
- Use an in-app checklist when:
- Use an email checklist when:
- Measure completion quality with activation events (not vanity clicks)
- What to measure instead
- Quality signals to track
- Examples: outcome-based checklists by plan motion
- Free trial checklist (optimize for fast proof)
- Freemium checklist (optimize for habit + expansion)
- Sales-assisted checklist (optimize for rollout readiness)
- A practical build process (you can run this week)
- The litmus test